Tutorial: How to Make a Simple Indian Style Kurti/Tunic

FloralKurtiCloseup

When you cannot visit India that often, you have to come up with creative solution to make Indian attire for your casual ethnic parties. That’s when I started looking for ready made sewing pattern available in fabric store in US. Guess what I found? Butterick Pattern 5812.

http://butterick.mccall.com/b5812-products-27960.php?page_id=155

You can get it either online or from fabric store. I bought mine for $1 sale from Hancock Fabrics 🙂

It is a very simple and easy pattern to sew. Let’s get started.

What You Need

KurtiMaterials

  • Floral Printed Fabric – 1 yard. (Mine is polyester, but cotton/cotton blend is perfect too)
  • Double Folded Bias Tape
  • Trim 3.5 yards
  • Fabric Glue
  • Scissors
  • Matching thread
  • Butterick pattern 5812

Let’s Get Started

Step 1: Do some measurement and figure out your size from the top back of the envelope. It is a loose fitting top so no accurate measurement is needed. Open up the envelope and cut out pattern piece 9, 10 and 11. Yes that’s it, only 3 pieces if you attach sleeves or use piece 9, 10 if you want sleeveless.

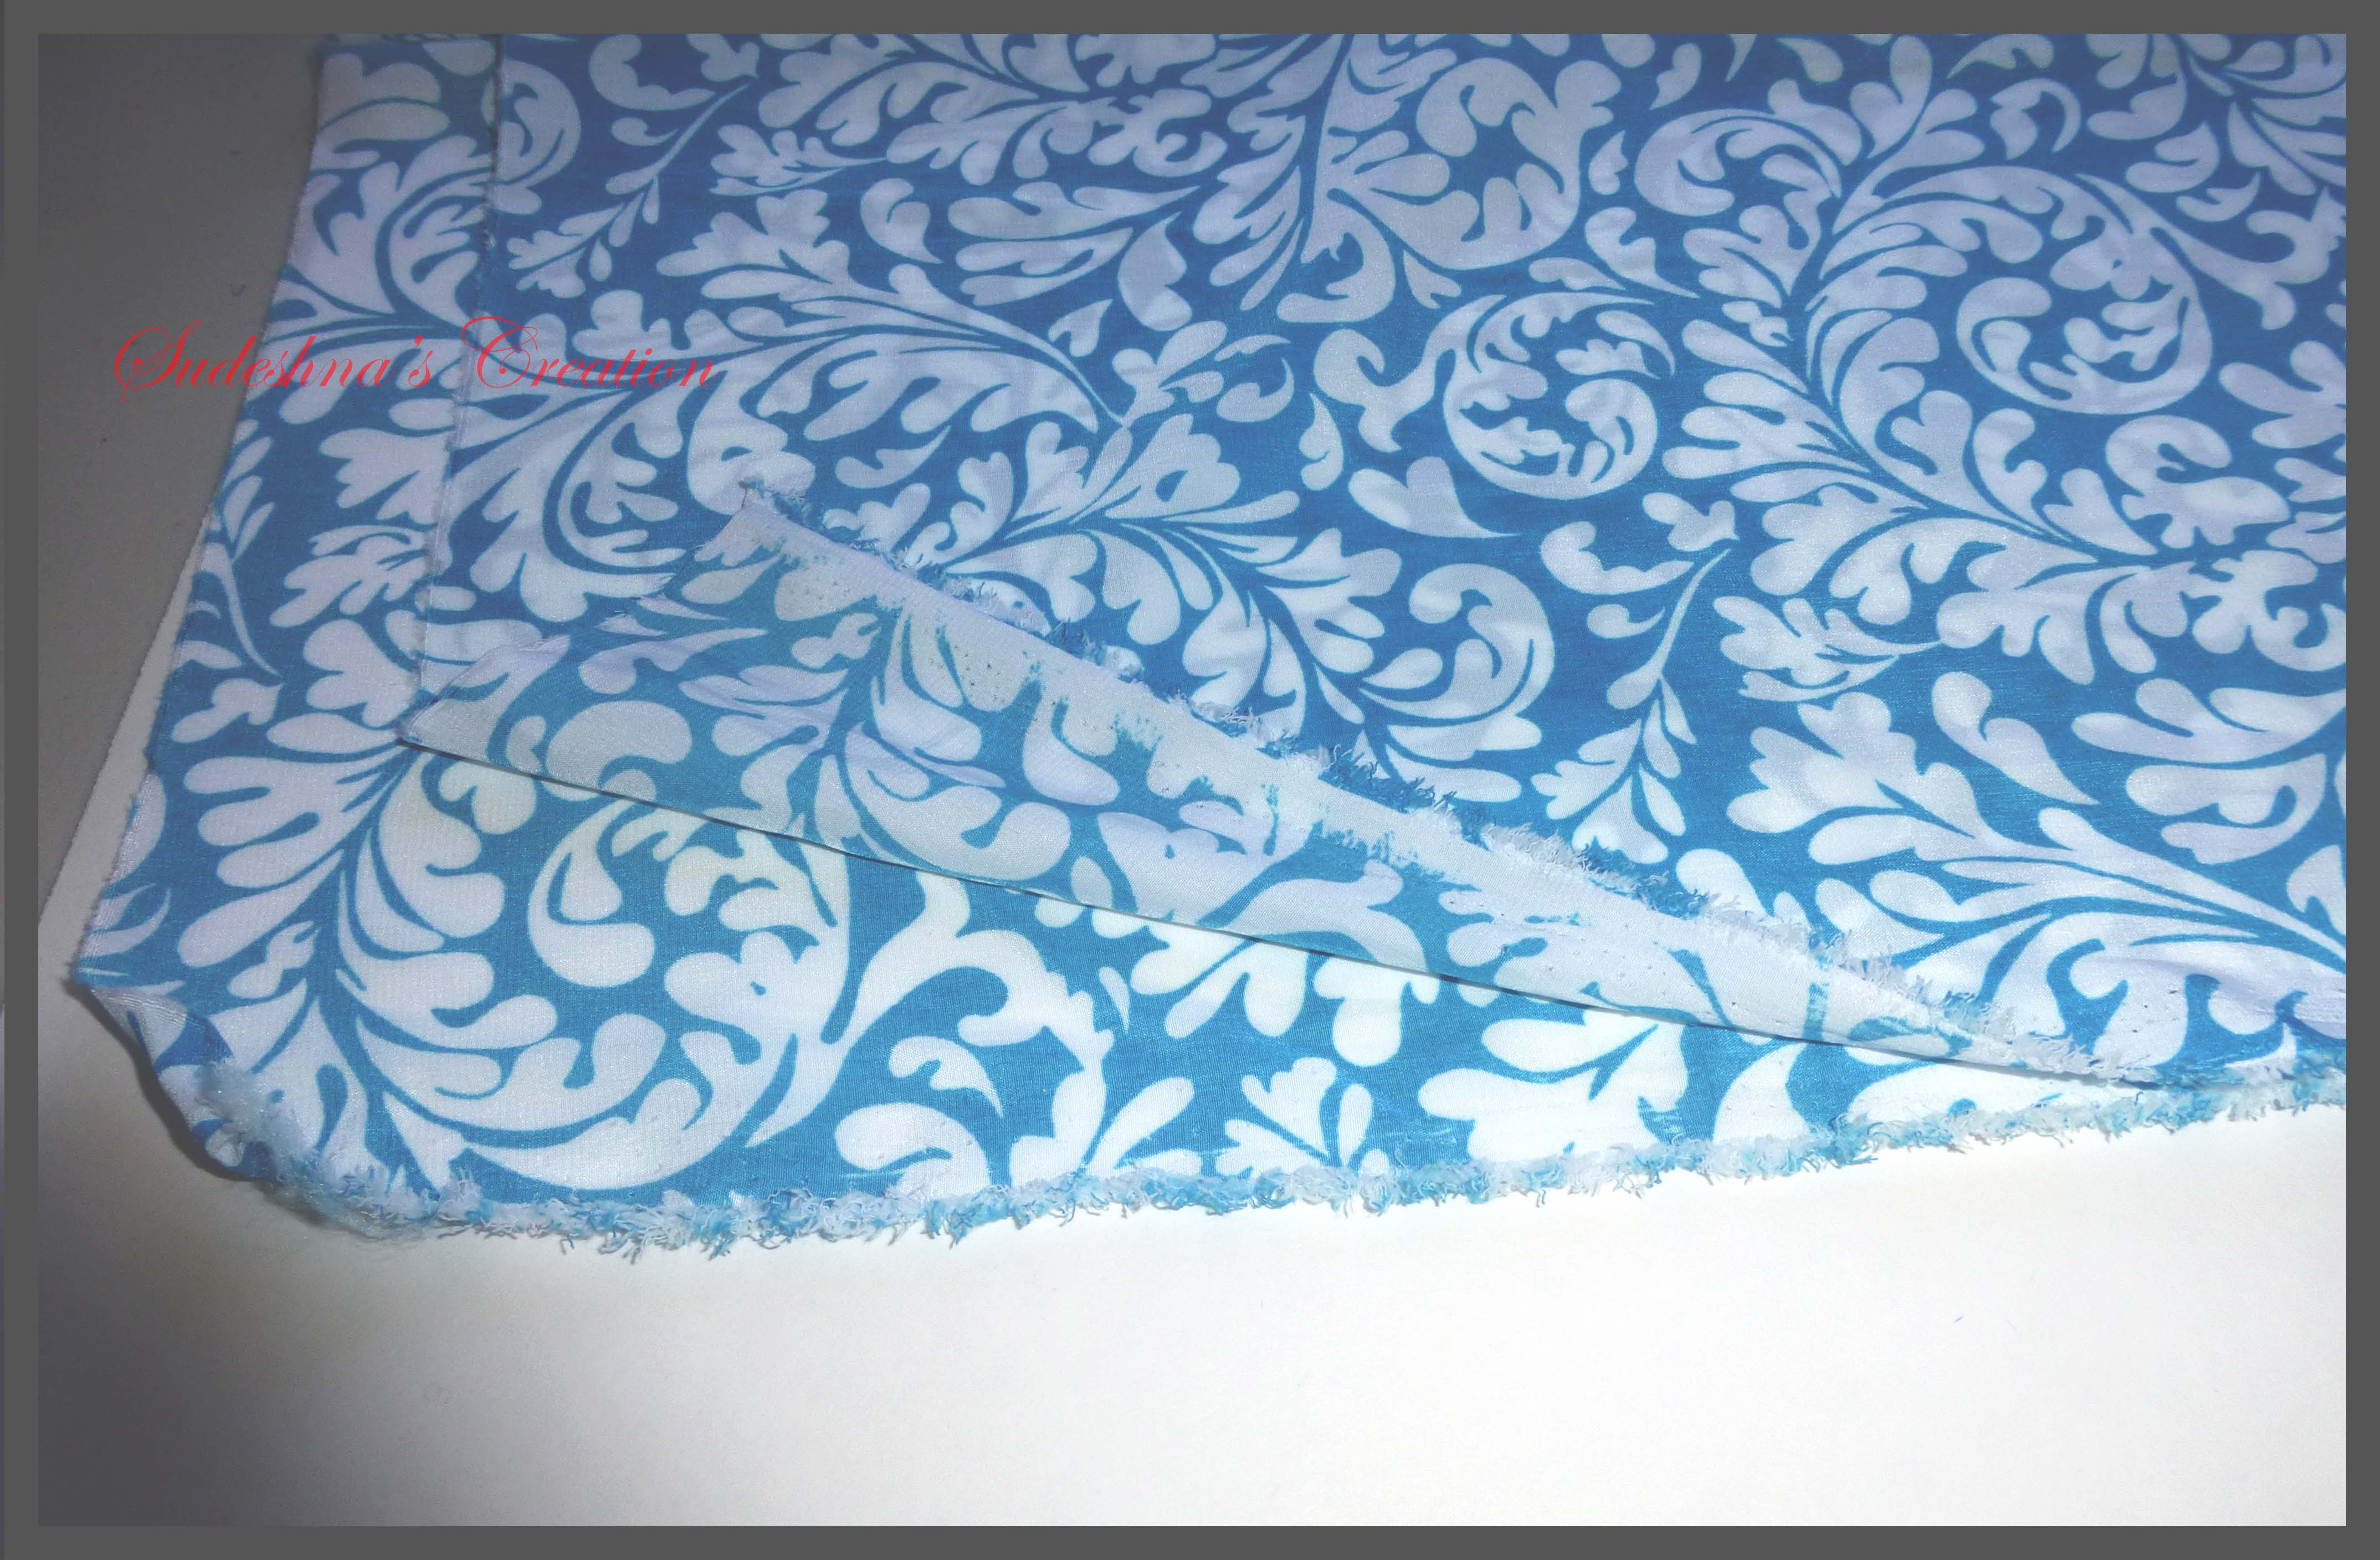
Step 2: Fold the fabric in half as shown in the picture below( unfinished edges together). Unfinished edge is called selvage. Place pattern piece 10 ( along  the fabric fold line) and piece 9 and 11 on the fabric. Use a pair of sharp scissor to cut the fabric.

P1010278P1010271

Step3: Change the neck line like shown in the picture if you would like to alter the neckline. You can keep the exact rounded neckline for simplicity. That will work fine too.

Neckline

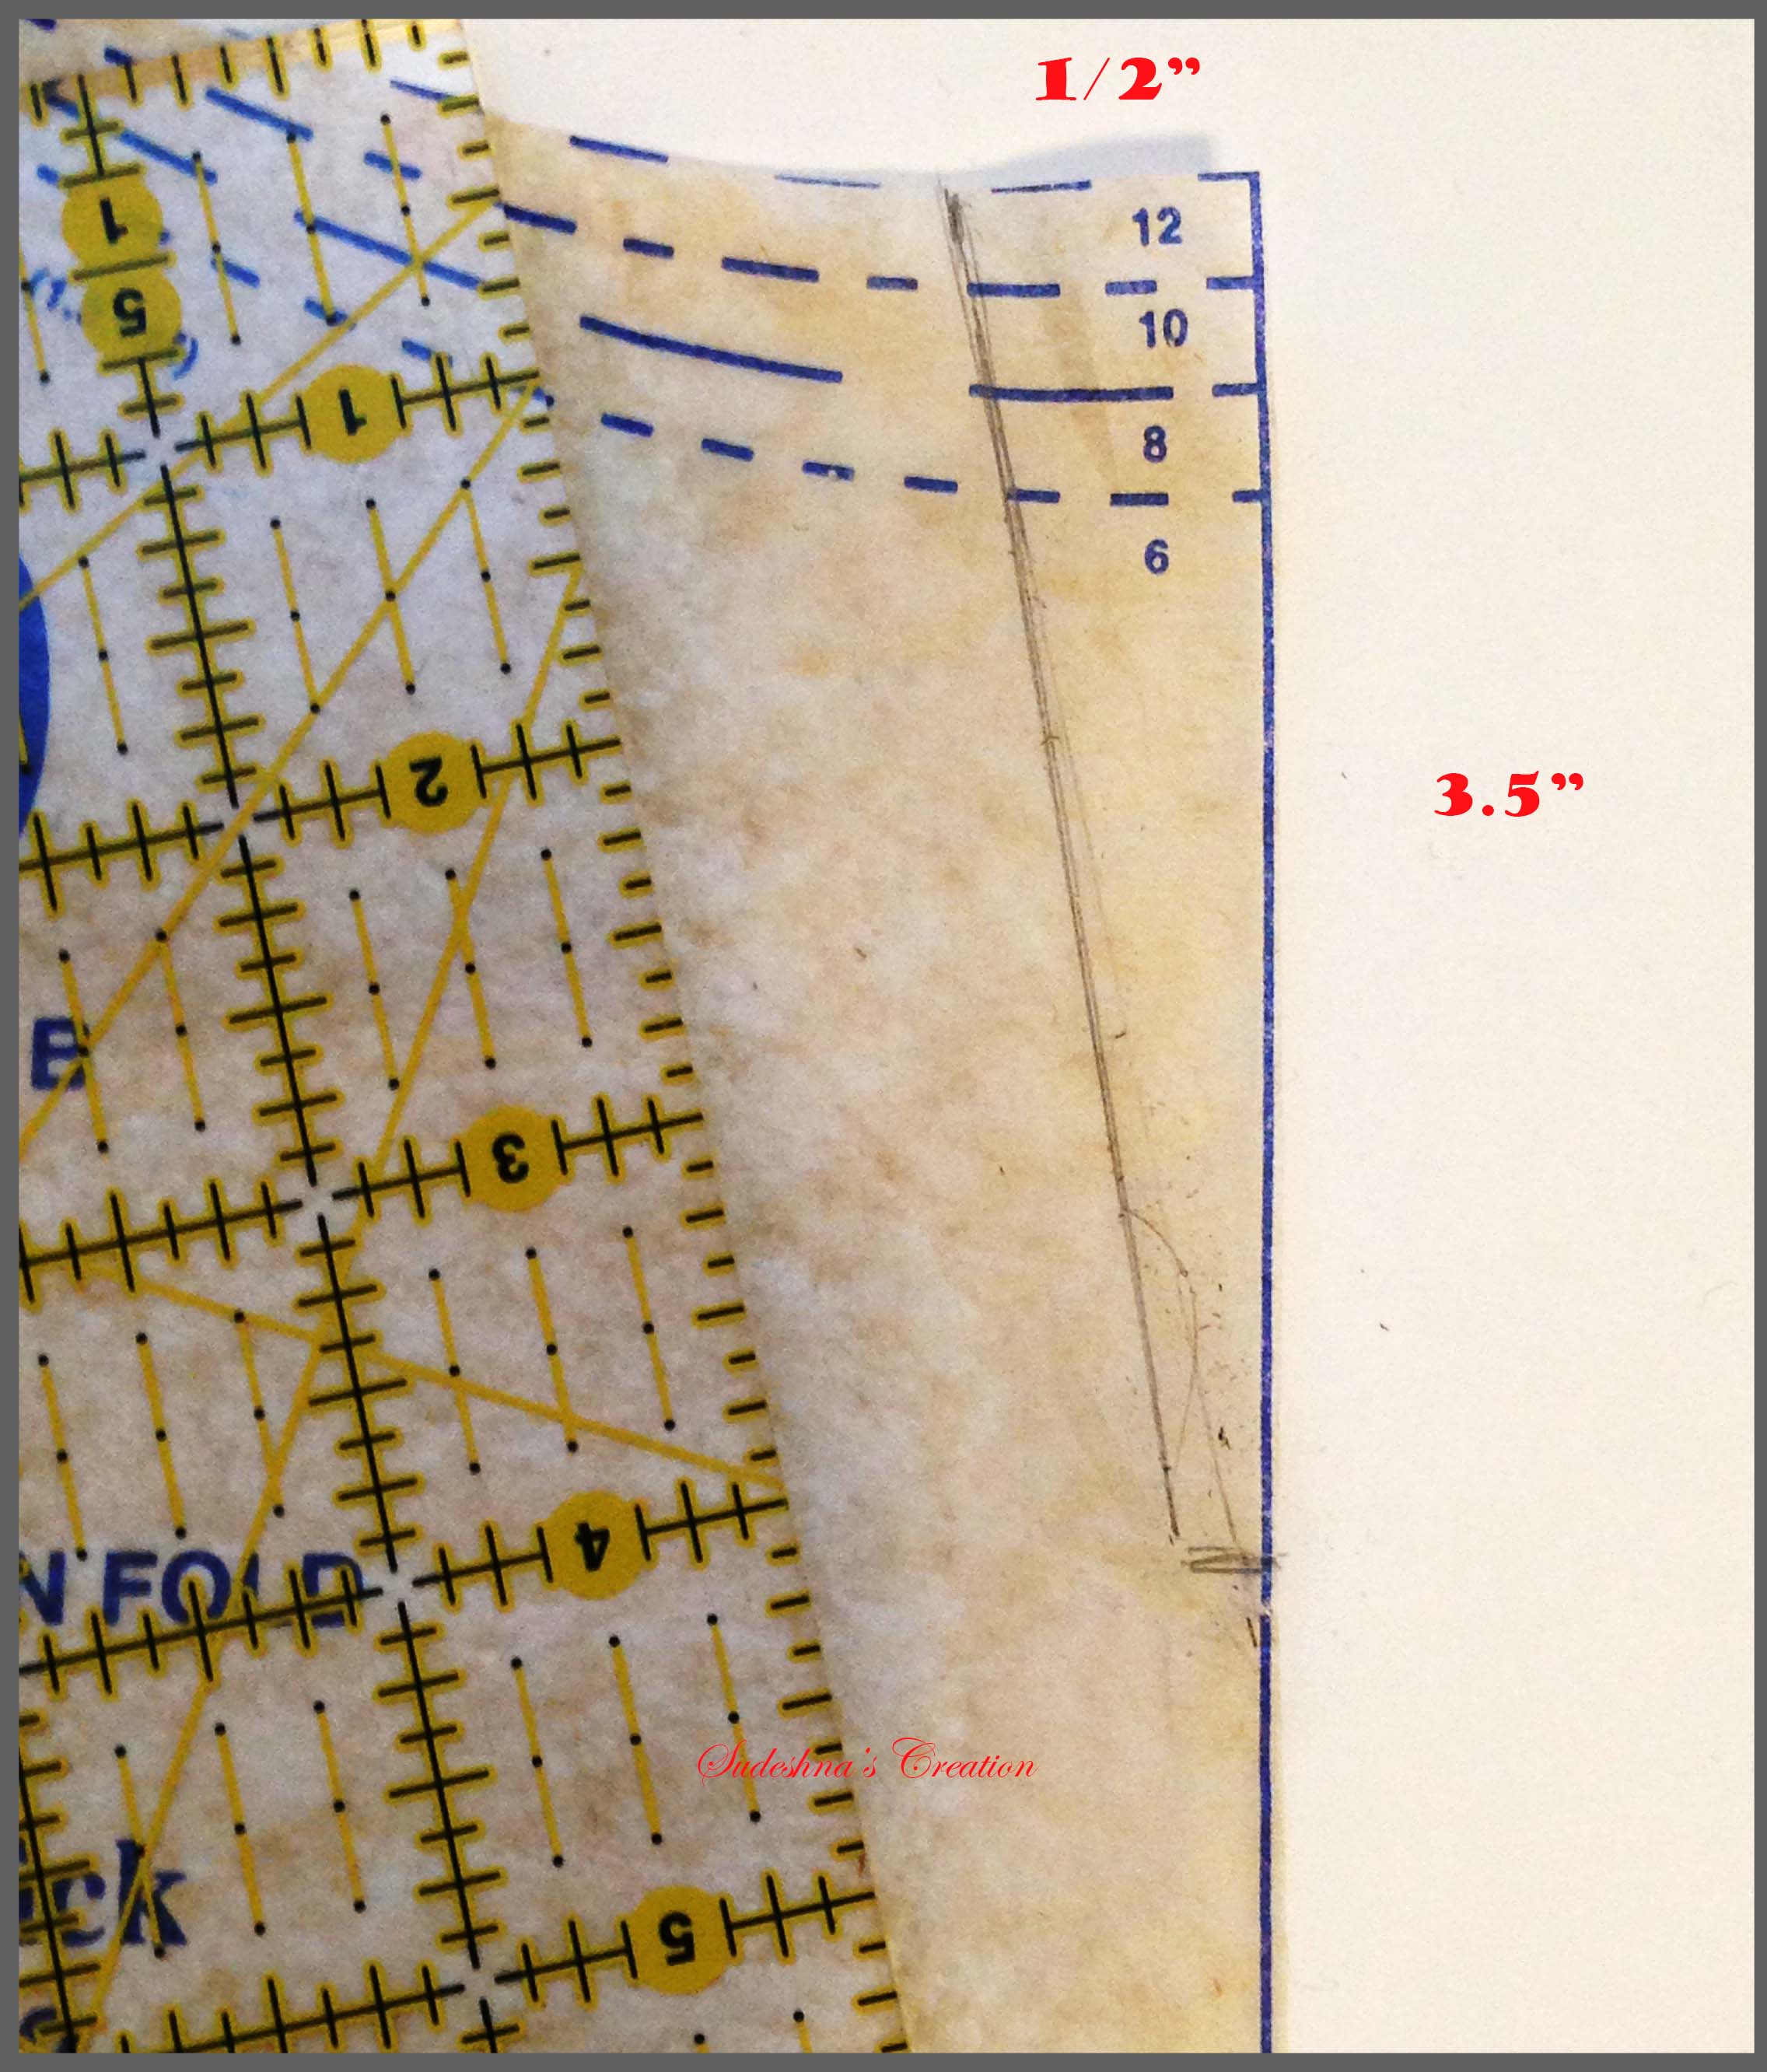
Use this new pattern to cut the piece 10 (front of the tunic).

Step 4: Sew style B using the pattern instruction and finish the neckline using double folded bias tape. Now use a fabric glue to attach the trim along the neckline. I used a sequin trim so I cannot use machine to sew. But if you use a embroidered trim or fabric based trim you can use machine to sew it on.

Note: I  altered the pattern at the back side. You can sew the whole backside up. The neck is wide enough that the top should slid right into your body without any back opening. Try it first. It makes the back sewing a breeze. No need to worry about finishing with button or zipper, as instructed in the pattern.

biastapefinishingneckline

Step 5:  Attach the sleeve according to the instruction and after hemming glue/sew the trim.

Step 6: Finish hemline and glue/sew the trim.

End product:

IndianStyleKurti


Snowflake Star

Snowflake star

That’s the name my son chose for this star when I asked him to name it. I could never see a snowflake until he pointed it out. Now I can clearly see one. Aren’t the kids amazing? Amazing is their imagination.

Let me write a thing or two about paper -piecing and what I found out while doing this kind of quilt piecing. If you read books or article about this technique people would mention how easy it is and it will give quite accurate corner without worrying about perfect cutting etc. That is all true. If you always dread about making cutting perfect pieces and make it all magically match after you sew them together then this is the perfect method to quilt. You follow the previously drawn pattern on paper and stitch along the lines, no more worries about not being able to make a perfect 1/4th inch seam or cutting.

snowflake star1

But let me tell you some cons as well. This method is rather slow than normal quilt piecing. So unless you have lot of patience its very hard to finish a big quilt using paper piecing. And another thing about it is wastage of fabric and paper. At the end of the project you end up being the messiest person in your household with small cut outs of fabric and shredded paper all over.

snowflake star2

In spite of all these drawback I admit I am quite addicted to paper-piecing quilts, mainly because the results turns out to be quite amazing.

I found this YouTube link very easy to follow when I learned this technique.

In the above tutorial she used rotary cutter and ruler to cut 1/4th inch seam allowance after the sewing. That is not necessary. You can you scissors to cut the fabric instead. This will not make any difference in the look or result of the finished block.

There are a lot of free paper-piecing patterns. One such website is http://piecebynumber.com/

Hope you like my rainbow snowflake star. If you want to know more about what star I am making next don’t forget to like my Facebook page.

Rainbow Star Quilt Block Series

start1_complete

Here is the first of my rainbow star series. Having a lot of fun creating my own paper piece quilt patterns of different stars and quilting it using paper piecing technique. I will try to post a new star every week until I have enough blocks to make a big sampler quilt.

Below are few picture showing the steps to make the block. Hope you can make one. You can use solid colors or printed to make it. Use your imagination and creativity.

Step1: Print the design on paper and piece the block using foundation/paper piece technique. For techniques on how to learn paper piecing search YouTube.

start1_step1

Step 2 Make Block 1 and block 2star1_step2


Step 3 Stitch the two blocks together.

start1_step3

Step 4 Backside of the block after joining the two blocks.

star1_step4

I have created these patterns myself using Adobe Illustrator.

Image

Countdown To 2013 !

Happy New Year to You!

Countdown to New Year or countdown to fiscal cliff or doomsday? Have you ever thought how many days we wait for The Day to come in our life? Why not celebrate everyday like the special day and enjoy every moment in our life? Just a thought!

block 3 detail

This block pattern is called Circle of Geese from http://www.piecebynumber.com. I changed the color arrangements and added some customization to make it my own.

block 2This technique of quilt piecing is called foundation piecing or paper piecing. Instead of cutting the fabric in pieces and stitching them to make pattern, here the pattern itself is printed on paper and is used as a foundation to guide you stitch. The above mentioned website is a good source to learn the technique if you are interested.

P1000226_1

I appliqued the numbers 3, 2, 1 to customize it.  I stitched a decorative border and added a colorful binding to finish the quilt.

Hope this quilt will bring rainbow of colors in our lives!